
home moa vmx vmdk links about donate forum downloads
|
getting started : MOA-2.4.1 for USB
|
|
Watch
setup tutorial ------------------------------------------------------------------ Create the boot-images Create the boot-images for forensic use ------------------------------------------------------------------ Get practice 1 - using cheatcodes Get practice 2 - using "moa-is-at-home.tag" Get practice 3 - load on demand Get practice 4 - low RAM conditions Get practice 5 - automated tasks Get practice 6 - automated interactive tasks ------------------------------------------------------------------ Settle down : select a portable device 1. boot : create personal encrypted environment 2. boot : add Workstation 6.5.2 3. boot : add Workstation 6.0.5 optional 4. boot : add VirtualBox optional 5. boot : add esx-tools ------------------------------------------------------------------ Customise it - theory Customize it - the configuration files ------------------------------------------------------------------ some advanced lessons - work in progress Coldclone with vmware-vdiskmanager In-place_P2V use a ESXi-VM to access VMFS schedule tasks across several reboots ------------------------------------------------------------------ |
Overview:
list of "features" covered by this howto: Workstation 6.5.2 / 6.0.5 selectable at boot-time VI-client for ESX 3.5u4 Starwind iSCSI |
|
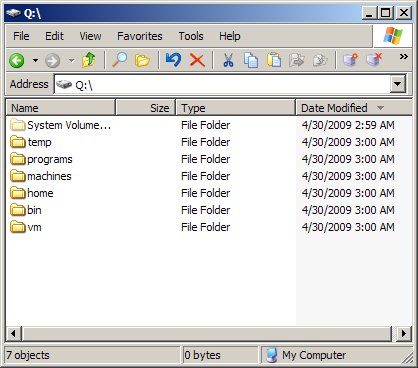
You should now have 3 iso-files in the directory iso-out.
|
| cheatcode | action |
| reboot | shutdown now |
| halt | shutdown now |
| cmd | open a cmd - back to prompt when exit |
| regedit | open regedit - back to prompt when done |
| help | display helptext - back to prompt when done |
| shell | run diskmanagement, regedit and cmd - back to prompt when done |
| create ramfile | creates a ramfile - back to prompt when done |
| ramfile | mounts a vmdk and goes to stage2 |
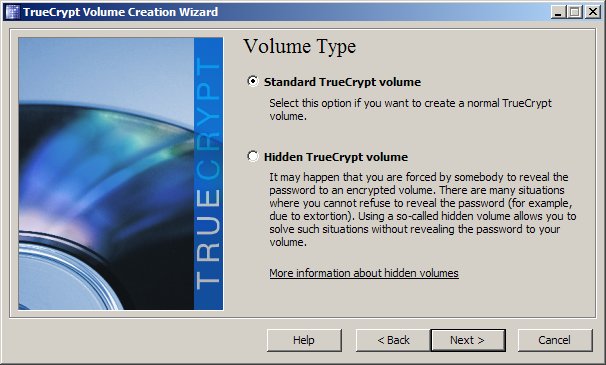
| tc | mounts a truecrypt-container and goes to stage2 |
| disk | opens diskmanagement and expects that you mount a partition to R: then goes to stage 2 |
| minimal | creates a ramdisk and sets the size to 16 Mb and goes to stage2 |
| mini | creates a ramdisk and sets the size to 32 mb and goes to stage2 |
| safe | creates a ramdisk and sets the size to 64 mb and goes to stage2 |
| tiny | creates a ramdisk and sets the size to RAM / 5 and goes to stage2 |
| lean | creates a ramdisk and sets the size to RAM / 4 and goes to stage2 |
| big | creates a ramdisk and sets the size to RAM /3 and goes to stage2 |
| splendid | creates a ramdisk and sets the size to RAM / 2 and goes to stage2 |
| remount | automated use of cheatcode disk - do not use manually |
| tc_auto | automated use of cheatcode tc - do not use manually |
| vmdk_auto | automated use of cheatcode ramfile - do not use manually |
| invalid input | display helptext - back to prompt when done |
|
Try this once: |
|
Advanced
1 - coldclone with vmware-vdiskmanager
the video was created with MOA 2.2 - early version - the basics
still apply |
|
Advanced
2 - in-place P2V
|
|
Advanced
3- using an ESX-VM to access VMFS
|
|
DEVICE
|
boots from |
personal files |
RAM | Performance | prize
(Euros) GB |
Description |
 |
USB1 | USB 2 | 384 | boot-time
: 10:30 start WS 6.5.2 : 0:15 start esx-tools : 0:18 start Vi-client : 0:45 responsivity : bad |
10 / 4 |
some hosts only boot with USB 1 speed |
|
USB2 | USB 2 | 384 | boot-time
: 3:30 start WS 6.5.2 : 0:15 start esx-tools : 0:18 start Vi-client : 0:45 responsivity : bad |
10 / 4 |
this is the cheapest way to get started - bad performance |
 |
USB 2 | USB 2 | 384 | boot-time
: 2:30 start WS 6.5.2 : 0:10 start esx-tools : 0:12 start Vi-client : 0:09 responsivity : ok
|
20 / 8 |
middle-class usb-stick |
 |
USB 2 | USB 2 | 384 | boot-time
: 3:00 start WS 6.5.2 : 0:06 start esx-tools : 0:09 start Vi-client : 0:10 responsivity : ok |
250 / 4 |
|
 |
USB 2 | USB 2 | 384 | boot-time
: 2:20 start WS 6.5.2 : 0:05 start esx-tools : 0:08 start Vi-client : 0:06 responsivity : good |
75 / 32 |
fastest stick I have ever seen |
 |
USB 2 | USB 2 | 384 | boot-time
: 2:07 start WS 6.5.2 : 0:04 start esx-tools : 0:07 start Vi-client : 0:06 responsivity : very good |
110 / 32 |
|
 |
USB2 | USB 2 | 384 | boot-time
: 2:15 start WS 6.5.2 : 0:04 start esx-tools : 0:07 start Vi-client : 0:07 responsivity : good |
70 / 160 | good
performance - large storage capacity for the money |
 |
CD or USB |
USB
2 / eSATA |
96 / 384 |
boot-time
: depends start WS 6.5.2 : 0:04 start esx-tools : 0:07 start Vi-client : 0:07 responsivity : good |
70 / 160 |
most compatible combination
|
 |
TFTP iSCSI or USB |
USB
2 / eSATA |
384 | boot-time
: depends start WS 6.5.2 : 0:04 start esx-tools : 0:07 start Vi-client : 0:07 responsivity : good |
70 / 160 |
requires a DHDCP / TFTP server in the local network |
 |
CD | --- | 96 / 384 |
old-fashioned
|
||
|
SATA | SATA | 384 | boot-time
: 1:40 start WS 6.5.2 : 0:03 start esx-tools : 0:06 start Vi-client : 0:03 responsivity : very good |
110 / 32 | just
for comparison ... |
|
2. boot
- install Workstation 6.5.2 Download VMware-workstation-6.5.2-156735.exe
When done - reboot.
|
|
3. boot - install Workstation
6.0.5
|
|
Download VirtualBox-2.1.4-42893-Win_x86.msi
|
|
5. boot
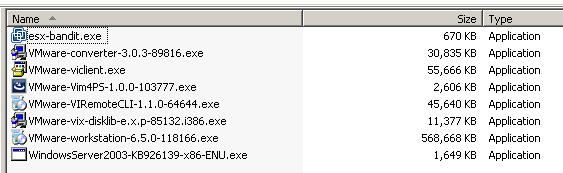
- prepare esx-tools-016 create a directory R:\_sfx_ and download this files into it: virtualbox-lodr.exe Next create a directory named R:\src - to safe disk space in the
container the following list of files is only needed once - that is why it
is recommended to
No matter where you actually store this files - your directory R:\src
should now have at least this files
When done - reboot.
|
|
Next table lists the MOA bootup-procedure and shows how the single
steps can be influenced |
|
action |
configuration |
|
load image into RAM |
read WINNT.SIF and load specified image into RAM |
|
detection of mass-storage |
depends on the driver-package you added |
|
mount volumes |
if HKLM\SYSTEM\ControlSet001\Services\MountMgr\NoAutoMount = 1 |
|
start peloader.exe |
if HKLM\SYSTEM\Setup\CmdLine = PELOADER.EXE * |
|
start moa.exe |
if HKLM\SYSTEM\Setup\CmdLine = PELOADER.EXE Systemroot%\system32\shell\moa.exe |
| set moa-ini-path | if exist X:\i386\system32\shell\moa.ini set moa-ini-path = X:\i386\system32\shell |
| firstbatch | if exist X:\i386\system32\shell\firstbatch.cmd (needs moa2.4-037.exe) |
|
check if this is really MOA |
read HKLM\SOFTWARE\sanbarrow\allow_start |
| read early config | read start_kiosk= in
X:\i386\system32\shell\moa.ini read default_cheatcode= in X:\i386\system32\shell\moa.ini |
|
switch to kiosk-mode |
if start_kiosk=yes in X:\i386\system32\shell\moa.ini hide moa.exe-gui |
|
preset default cheatcode |
use default_cheatcode= and preset cheatcode-prompt |
|
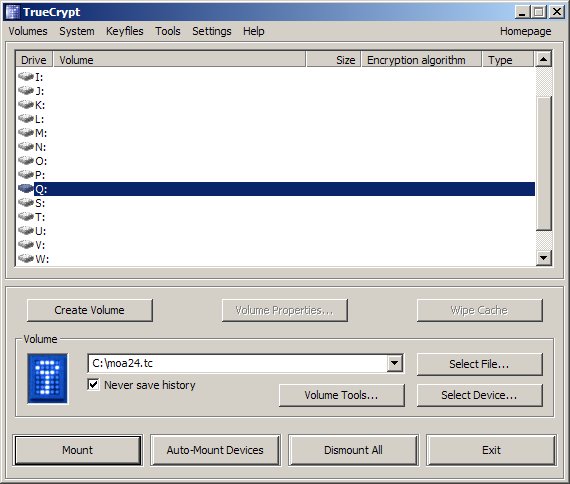
scan local disks for |
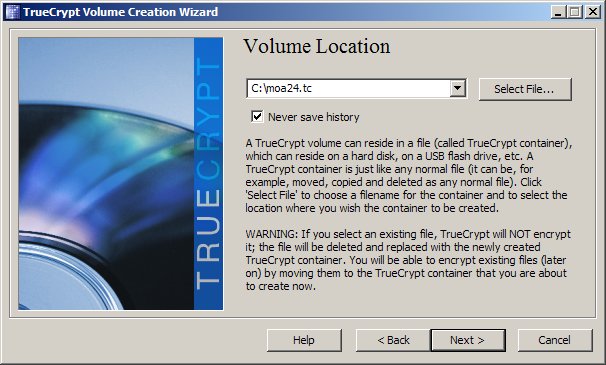
if found moa24.tc - preset cheatcode-prompt
with tc_auto |
| cheatcode-prompt |
wait moa_timeout=5000 milliseconds - then set current value for default_cheatcode= |
|
decide next steps |
|
|
mount something to R: |
if default_cheatcode=tc
ask for password and mount any truecrypt-container
to R:\
|
|
detect drivetype of R:\ |
if drivetype R:\ = ramdisk populate R:\ with contents
of X:\moahome\ |
|
set new path to moa.ini |
if start_kiosk=no and if exists R:\bin\moa.ini set moa-ini-path = R:\bin |
|
start explorer |
if start_explorer=early start explorer |
|
earlybatch |
if start_earlybatch=yes run moa-ini-path\lastbatch.cmd |
|
register dlls and ocx |
|
|
early mount |
if mount_tdrive=early mount
R:\_sfx_tdrive.cmd to driveletter T:\ if wim2_mount=early read wim2_path= and mount named file to R:\vm\converter |
|
prenetworkbatch |
if start_prenetworkbatch=yes run moa-ini-path\prenetworkbatch.cmd |
|
loading VMware stage 1 plan B |
if start_vmware=yes and if not exist r:\vm\vmware\vmplayer.exe - select a directory |
|
loading VMware stage 1 plan C |
if start_vmware=yes and if not existr:\vm\vmware\vmplayer.exe - select a wim |
|
loading VMware stage 1 plan A |
if start_vmware=yes and exist r:\vm\vmware\vmplayer.exe |
| VMware version detection | if start_vmware=yes get version r:\vm\vmware\vmplayer.exe |
| inject VMware network drivers | if start_vmware=yes and version is known inject network drivers |
|
plug and play detection |
if exist hwpnp.cmd execute it - else run hwpnp.exe with default parameters |
|
load network |
read vmnet1_name= and read
vmnet1_IP= and set IP for virtual adapter
1 |
|
loading VMware stage 2 |
if start_vmware=yes and version is known load it |
|
start services |
if start_eventlog=yes start
EventLog |
|
late mount |
if mount_tdrive=late mount
R:\_sfx_tdrive.cmd to driveletter T:\ |
|
start wireless support |
if start_wireless=yes |
|
latebatch |
if start_latebatch=yes run moa-ini-path\latebatch.cmd |
|
lastbatch |
if exists R:\bin\lastbatch.cmd |
|
interactive batch |
if exist R:\bin\interactivebatch.cmd |
|
restart explorer |
if process explorer exists kill it and restart it |
|
start explorer |
if start_explorer=yes |
|
startup Converter ColdClone mode |
if start_converter=yes |
|
startup sequence finished |
if start_kiosk=no activate buttons in moa.exe |
|
Customize it - the configuration files
|
|
configuration - moa.ini start_sshd=yes start_earlybatch=yes [NETWORK] vmnet1_IP=192.168.52.1 [AUTOMOUNT] wim1_mount=no
|
file = moa.ini |
| top | |
|
configuration - earlybatch.cmd
del r:\home\moon\desktop\starwind.lnk rmdir /s /q "R:\programs\StarWind Software\StarWind" |
file = earlybatch.cmd this batch can be used to clean up from last run.
|
| top | |
|
configuration - prenetworkbatch.cmd |
file =prenetworkbatch.cmd |
| top | |
|
configuration - hwpnp.cmd |
file =hwpnp.cmd |
| top | |
|
configuration - latebatch.cmd |
file = latebatch.cmd |
| top | |
|
configuration - lastbatch.cmd |
file = lastbatch.cmd Iin kiosk-mode use this to reboot or shutdown |
| top | |
configuration
- interactivebatch.cmd
|
file = interactivebatch.cmd |
|
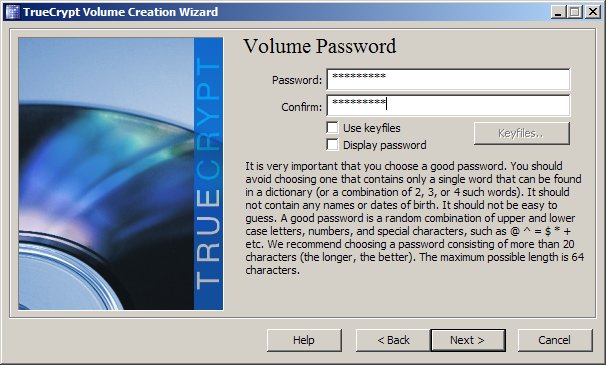
using a dedicated USB-disk instead of the truecrypt-container
Maybe you don't want to enter a password during boot or are not satisfied
with the size-limitations of a container |
|
The MOA-plugins
|
|
how to add your apps |
|
Tactic |
Instructions | Example |
| Plan A | just install it once | portable Apps - simple apps |
| Plan B | silently install it on demand | Starwind,
NFSD, VMX-explorer recommended for apps that install drivers |
| Plan C | check
if a LODR-pack exists - if yes use a LODR-pack on demand |
Dotnet, ViClient, VirtualBox |
| Plan D | install once - use regshot and create a patch - use that to load on demand | Autoit,
7zip, DreamWeaver ... apps that use file-associations or need licenses |
| Plan E | install once - use Installrite and create a patch - use that to load on demand | Java, various runtimes, more complex programs |
| not recommended | create a plugin |
home moa vmx vmdk links about donate forum downloads
![]()